When dealing with a hard drive not showing up in Windows 10, it can be a source of great frustration.
Before you start to worry, it's important to understand that this is a common issue that many users face, and it can be easily resolved. Personal and professional data stored on a hard drive is crucial, and it can be alarming to see it suddenly disappear. With the right approach and some troubleshooting, you can easily get your hard drive back up and running quickly.
Whether you're using an internal or external hard drive, the steps to fixing this issue are relatively similar. In this guide, we'll walk you through everything you need to know to get your hard drive showing up again on your Windows 10 device.
Why Is My Hard Drive Not Showing Up in Windows?
Before we dive into the solutions, let's understand why your hard drive doesn't appear in Windows. Several reasons could lead to this problem:
- Faulty Connections: Loose or damaged cables and connectors can disrupt the connection between your hard drive and computer, leading to intermittent or lost connection. Regularly checking and maintaining the condition of cables and connectors is crucial for a stable and reliable connection.
- File System Issues: If your hard drive's file system becomes corrupted or changes due to errors or unintended modifications, Windows may not recognize it. This can result in data loss, file inaccessibility, or system instability. Regularly backup your data and promptly address any file system issues to ensure a smooth and reliable computer system.
- Drive Letter Conflict: When connecting a new hard drive to your computer, it may share the same drive letter as another device, causing it to become invisible or inaccessible. To resolve this, assign a unique drive letter to each device to ensure the visibility and usability of your hard drive.
- Outdated Drivers: When your disk drivers are outdated, it can create compatibility issues and hinder your hard drive's proper functioning, resulting in your system not recognizing it. Updating your disk drivers is recommended to ensure smooth and uninterrupted performance of your hard drive.
While these are some common reasons why your hard drive may not be showing up on Windows 10, other underlying issues could be specific to your device. Let's dive into the steps you can take to fix this problem.
Where Is My Hard Drive?
If your internal hard drive is not appearing, it may be because it needs to be initialized or formatted. It's important to check that your disk is correctly connected to the motherboard using the SATA cable. Additionally, ensure that the power supply to the hard drive is properly connected and provides sufficient power.
Remember that certain BIOS settings may cause your HDD to remain hidden in the Windows 10 operating system, so it's worth checking those settings. These steps will help troubleshoot the issue and ensure your hard drive is recognized and accessible.
Fix HDD Not Showing Up in Windows 10
An HDD, also known as a Hard Disk Drive, is a non-volatile memory device that stores data on magnetic surfaces. It's the primary storage medium for most computers, and being unable to access it can be problematic.
How to Fix Windows 10 That Doesn't Recognize My Hard Drive?
Hard drives, whether new or old, internal or external, can suddenly stop appearing in File Explorer or Disk Management. This common issue in Windows 10 can range from minor inconveniences to serious problems. If you can boot up your device, there is less cause for concern, but losing access to files is possible if Windows 10 cannot boot from the problematic drives.
- If you encounter the Windows 10 hard drive not appearing when you right-click "This PC" and select "Manage." Navigate to "Disk Management" and check if the hard drive is missing or showing up as not initialized and unallocated space.
- If you find the hard drive listed here, it's likely not visible in File Explorer due to unknown device status, uninitialized disk, or unallocated disk space. To resolve this, let's initialize the disk using the following steps.
- Find the "This PC" icon on your desktop or the Start menu, then right-click on it. From the context menu, select "Manage."
- Find "Disk Management" in the left pane in the Computer Management window.
- Right-click on your new hard disk within the lower section of the window, and choose the "Initialize Disk" option.
- A dialog box will appear, showing the uninitialized disk. First, select the disk you want to initialize.
- Decide whether to use the MBR (Master Boot Record) or GPT (GUID Partition Table) partition style for your disk.
- In Disk Management, right-click on any unallocated space on your hard disk. Choose "New Simple Volume" from the context menu. The New Simple Volume Wizard will open.
- Click "Next" to proceed and follow the steps in the wizard to specify the volume size.
- Assign a drive letter to the volume.
- Choose the format options for the new partition, such as the file system and allocation unit size, and then click "Next" to continue.
- Review your selections in the wizard and make any necessary adjustments. Click "Finish" to create the new partition.
You have successfully initialized your new hard disk and created its partitions. You can now use the disk for storing and organizing your data as needed.
How to Fix New Hard Drive Not Detected on Windows 10
Possible reasons for a new hard disk not being detected by your computer or Disk Manager include driver issues, connection problems, and faulty BIOS settings. To troubleshoot, ensure the driver software is installed and up to date, try different USB ports or cables, and check BIOS settings. Resolving these issues can help get your new hard drive working properly.
Here are some additional tips to help:
- Check Your Connection - Connect your hard drive using a SATA cable instead of a USB cable. Change the cable port to see if that resolves the problem. If the issue persists, connect the hard drive to another computer to determine if it functions properly. This will help identify whether the problem is with the hard drive, your computer, or the cables.
- Update Your Drivers - You cannot update drivers as usual when your hard drive is undetected. Instead, you should visit the official support site of the hardware manufacturer and download the latest driver that matches your product. You can manually install it or use a driver update tool to automatically scan and install the correct driver.
- Enable the Hard Drive in BIOS - Restart your computer and enter your BIOS using the instructions for your device. Navigate using the arrow keys and select "Integrated Peripherals" by pressing the Enter key. Locate "USB Controller" and ensure it's enabled. Save the changes, restart your computer, and check if the issue has been resolved.
Using these tips and steps, you can fix a new hard drive not showing up on Windows 10 and ensure the smooth functioning of your computer's storage system.
How to Fix Windows 10 Hard Drive Not Visible
This comprehensive guide will provide you with easy-to-follow steps to troubleshoot and resolve the problem. Whether you are setting up a new system or experiencing sudden recognition issues with your hard disk while using Windows 10, this solution will assist you in resolving the matter effectively.
1. Check If Hard Disk Is Connected Properly
To resolve a Windows 10 hard drive visibility issue, one of the initial steps is to check the physical connection of your hard disk to your computer. Loose or disconnected cables can sometimes be the cause. It's a simple yet crucial check that can prevent unnecessary troubleshooting.
First, ensure that the wires connected to your hard drive are secure. If you have a desktop computer, the cables can get detached due to minor bumps or movements, so make sure everything is securely in place. If you use an external USB hard drive, check the cable for any damage and try using a different one if possible.
Check if the hard drive is receiving enough power to function properly. Sometimes, using a faulty power cable can lead to problems with the hard disk visibility. Using a different power cable or outlet can help resolve the issue and test whether the problem lies with the hard drive or not.
2. Initialize Disk
If you've confirmed that your hard drive is connected properly, but it's still not visible in Windows 10, you may need to initialize the disk. Disk initialization is a process that prepares the hard drive for use by the operating system. This can often resolve the issue and make your hard drive accessible again.
- Open the "Disk Management" tool on your computer by pressing Windows key + X simultaneously. Then, choose the "Disk Management" option from the menu that appears. Alternatively, you can press the Windows key + R shortcut, and in the "Run" box, enter "diskmgmt.msc."
- In the Disk Management window, you'll find a list of all the hard drives connected to your PC. Locate the drive that is unallocated and marked as unknown. Right-click on this drive to reveal a context menu and select the "Initialize Disk" option.
- A prompt asks you to choose between a GUID Partition Table (GPT) and a Master Boot Record (MBR). Decide on one of these options and click "OK." (Generally, GPT is the recommended choice, but you may want to research these options further online before selecting.)
- The Disk Management window will now redirect to the initialized hard drive, which should be listed as "Online" and "Basic." Right-click on this drive and choose "New Simple Volume" from the context menu. Click "Next" to proceed.
- In the next window, you will be asked to assign a drive letter. Choose an available letter from the drop-down menu and click "Next."
- You will now be guided through the formatting process using a wizard. Most users prefer to use the NTFS file system. Opt for a quick format, which is faster. Once the formatting process is complete, you will see the hard drive in File Explorer.
If, for some reason, you still can't find the hard drive in File Explorer, try restarting your PC. This should help the system recognize and display the newly initialized and formatted hard drive.
3. Assign a Drive Letter for the Drive
When your hard drive doesn't appear in Windows 10, it may be missing a drive letter. Without a drive letter, the system won't recognize the drive as a usable storage device. To fix this, access the Disk Management tool and assign a drive letter to your hard drive.
- Run Disk Management on your computer. You can do this by searching for "Disk Management" in the Windows search bar and selecting the appropriate result.
- In the Disk Management window, look for the partition that does not have a drive letter assigned to it. It will be displayed without a drive letter next to its name. Right-click on the partition without a drive letter, and choose the "Change Drive Letter and Paths" option.
- Inside this dialog box, click on the "Add" button. Another dialog box will appear.
- In the new pop-up dialog box, you will see an option that says, "Assign the following drive letter." Select this option.
- A drop-down list will become active. From this list, pick a letter that you want to assign to the partition. This letter will be used to identify the partition.
- Once you have selected the letter, click the "OK" button to confirm your choice. The drive letter will now be assigned to the partition.
Once you have successfully assigned a drive letter to the partition, it is advisable to restart your PC system to ensure that the changes are implemented. After restarting, verify if the issue has been resolved. You should now be able to access the partition using the newly assigned drive letter.
4. Update Drivers
Outdated or incompatible drivers can also cause a hard drive to become invisible in Windows 10. To address this issue, update your storage controller and disk drivers. This ensures that your operating system can communicate with the hard drive properly.
- Begin by opening the search box using the Windows key + S shortcut. In the search box, type "Device Manager" and open the applet.
- Within Device Manager, you'll see a list of hardware categories. Look for the "Disk drives" section and click on it to expand it. Now, you should see the hard drive you want to update listed under the section.
- Right-click on the specific hard drive you want to update. From the context menu, select the "Update driver" option.
- A dialog box will appear, asking if you want to update the driver automatically or manually. We recommend choosing the automatic update option, but if you have a specific driver update file on your computer, you can select the manual option.
- If you choose automatic update, the system will search for the latest driver online and install it. Follow the on-screen instructions provided by the installer wizard.
After the driver update, the system may prompt you to restart your computer. Make sure to save your work and restart your computer as instructed. Check if the hard drive is now visible in File Explorer.
5. Run "chkdsk" to Repair the Inaccessible Hard Drive
Sometimes, the invisibility of a hard drive in Windows 10 can be attributed to file system errors or bad sectors on the disk. To address this, you can run the chkdsk (Check Disk) utility to scan and repair issues on your hard drive. It's a comprehensive tool that often brings your hard drive back to a working state by fixing common disk-related problems.
- Click on the Start menu, which you can find in the lower left corner of your computer screen. In the search box, type "cmd" without the quotation marks.
- Right-click on the "Command Prompt" option to open a context menu. In this menu, choose the "Run as Administrator" option. This grants the necessary administrative privileges to perform certain operations.
- Type "chkdsk C:/r" without quotation marks, where you must replace C: with your actual drive letter.
- After typing the command correctly, press the "Enter" key on your keyboard. This will initiate the process of checking and repairing your hard drive.
- Once the process is finished, you will see a report of the actions taken and any fixed issues. Pay attention to this report for any potential problems.
- Reboot your PC after completing the chkdsk process to ensure everything functions correctly. If your hard drive is accessible without any problems, the issue is likely resolved.
If the hard drive is still not visible or you encounter further problems, you may need to explore additional solutions or seek professional help.
Run the "diskpart" Command
The diskpart command is a powerful built-in Windows utility that can help fix a non-visible hard drive. By using this command-line tool, you can clean, create, and format partitions on the hard drive. Using it can help resolve software-related issues and make your hard drive visible again.
- Open Command Prompt by searching for it in the Windows search bar. In the Command Prompt window, type "diskpart" and press the Enter key.
- Once in the diskpart utility, you need to execute a series of commands one at a time. After each command, press Enter. Here are the commands you should use:
- Type "list disk" and press Enter. This command will display a list of available disks.
- Type "select disk" followed by the number of the disk you want to format (e.g., "select disk 1"). Press Enter. Be sure you've selected the correct disk, as this step is crucial to avoid data loss.
- Type "clean" and press Enter. This command will wipe the selected disk clean.
- After you receive a message confirming that the command was executed successfully, you can close the Command Prompt window.
Finally, restart your computer to complete the disk formatting process. Remember to exercise caution and double-check the selected disk to avoid unintentional data loss.
Use the Hardware and Devices Troubleshooter
Windows 10 provides a handy built-in tool called the Hardware and Devices Troubleshooter. This tool is designed to automatically detect and fix issues related to hardware components, including hard drives. By running the Hardware and Devices Troubleshooter, you allow Windows to identify and resolve any problems preventing your hard drive from being visible.
- Click on the Start menu and choose "Settings" (also accessible using the Windows key + I shortcut), and then click on "Update & Security."
- On the left panel of the Update & Security window, you'll find the "Troubleshoot" option. Click on it.
- Now, on the right panel, look for the "Hardware and Devices" option and select it. After choosing "Hardware and Devices," click the "Run the troubleshooter" button.
- A window will pop up to analyze any hardware issues on your computer. Follow the steps provided by the troubleshooter wizard to complete the troubleshooting process.
It's important to note that the outcome of this process may vary, and it's not a guaranteed fix for all hard drive visibility issues. However, it's still worth trying as part of your troubleshooting steps.
Conclusion
Having an inaccessible hard drive can be frustrating, but with the solutions listed above, you can resolve the problem quickly. Whether it's updating drivers or running commands to repair file system errors, there are various methods to try before seeking professional help.
Remember always to exercise caution when dealing with sensitive data on your hard drive and double-check any actions that may lead to data loss. We hope these tips have helped in resolving your non-visible hard drive issue in Windows 10. So go ahead and give them a try!
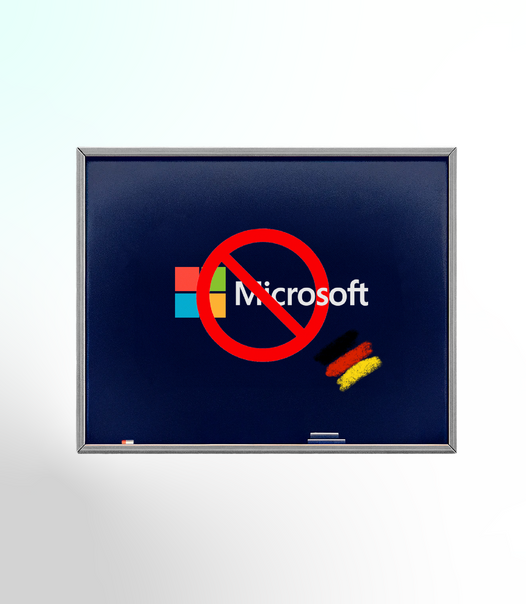
Supercharge Your Productivity With Truly Office
Discover a new way to enhance your productivity with Truly Office - the ultimate alternative to Microsoft Office. Unlock a world of possibilities by exploring our website and discovering the power of Truly Office. Don't miss out on valuable writing tips, troubleshooting advice, and informative articles. Take your writing skills to the next level!
Ready to revolutionize your office suite? Dive deeper into our comprehensive suite of tools designed to make your work life easier. Join the growing community of satisfied users who have already made the switch to Truly Office.
Don't settle for the status quo. Remember, success starts with the right tools. Visit Truly Office now and experience a whole new level of productivity.