Taking a screenshot on Windows can be your secret weapon when you want to capture a memorable moment from a video, save an important piece of information, or show someone exactly what's happening on your screen - we are here to teach you to do that!
Screenshots are incredibly versatile. They allow you to freeze a moment in time, and on Windows, there are several methods to do this. You can take a snapshot of your entire screen or just a part of it. You can annotate and highlight important details before sharing, and you can save these screenshots for future reference.
Why Screenshots Are Important
Screenshots, often captured with the Print Screen (PrtScn) key, might seem like a simple feature, but their importance can't be overstated. Here are several reasons why taking screenshots is crucial:
- Documentation: Screenshots serve as visual records of what's happening on your screen. Whether you need evidence of an online purchase, a software bug, or a conversation, a screenshot is like a snapshot in time, providing proof of what you saw or experienced.
- Communication: Sometimes, words alone can't convey a message effectively. A screenshot can instantly clarify what you're trying to explain. It's a powerful tool for tech support, online tutorials, and remote work when face-to-face communication isn't possible.
- Troubleshooting: When you encounter an error message or a technical problem, a screenshot can help experts identify the issue quickly. Instead of struggling to describe the problem in words, you can show it with a screenshot.
- Creativity: Screenshots can be used for creative purposes, too. Artists and designers often use screenshots as references or to capture inspiring images. Gamers capture memorable moments in their games to share them with friends and communities.
- Social Media: Sharing screenshots on social media is common, whether you want to share a funny tweet, a stunning Instagram post, or a helpful tip on Facebook. Screenshots make sharing content easy and accessible.
- Research and Reference: For students, researchers, and professionals, screenshots are indispensable for collecting information and referencing sources. They can be inserted into reports and presentations to support your points.
- Privacy and Security: Sometimes, you might need to document online interactions or transactions for security or legal purposes. Screenshots can help protect your interests in such cases.
You may think screenshots are just that - an image of your screen. However, they are an incredibly useful and powerful tool for a wide range of tasks and purposes. Learning how to take screenshots is a valuable skill that can save you time, effort, and even money in various situations. So, let's explore the different methods for taking screenshots on Windows!
Taking Screenshots on Windows
1. Using the Print Screen (PrtScn) Key
Taking screenshots using the Print Screen key is one of the most fundamental methods in Windows. You'll find this key at the top of your keyboard, often labeled as "PrtScn," "PrtSc," or something similar. You can take two different types of screenshots by default:
- Full-screen Screenshot: To capture your entire screen, press the "PrtScn" key. The screenshot is copied to your clipboard, ready to be pasted into an image editing program like Paint or Word.
- Active Window Screenshot: If you want to capture only the active window (the one you're currently working in), use "Alt + PrtScn."
The screenshots you take with PrtScn are not saved as files by default; they're stored on your clipboard. You need to paste them into an image editor and save them as needed.
Using the PrtScn key is quick and straightforward. However, it lacks some features like annotating or saving directly as a file, which other methods provide. So, if you need these additional features, explore the other methods mentioned in this guide.
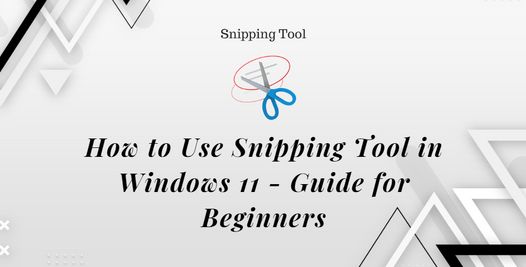
2. Snipping Tool

The Snipping Tool is a handy built-in utility in Windows that allows you to capture screenshots with precision and flexibility. To access it, follow these steps:
- Click on the Windows Start button.
- Type "Snipping Tool" in the search bar. It should appear in the search results.
- Click on the Snipping Tool in the search results to launch the application.
Once you have the Snipping Tool open, you'll find several snipping modes to choose from:
- Free-Form Snip: This mode lets you draw a custom shape around the area you want to capture.
- Rectangular Snip: With this mode, you can capture a specific rectangular area on your screen.
- Window Snip: It allows you to capture an entire window, like a browser or an application, just by clicking on it.
- Full-Screen Snip: Choose this mode to capture the entire screen.
After capturing your screenshot, you can use the Snipping Tool's editing tools to highlight, annotate, or crop your image. When you're satisfied with your edits, save the screenshot by clicking the "File" menu and selecting "Save As."
3. Snip & Sketch

Snip & Sketch was introduced in Windows 10, starting with the October 2018 Update (version 1809). It replaces the older "Snipping Tool" and offers additional features such as the ability to draw on screenshots, highlight sections, and crop images. It includes the same basic snipping modes as the Snipping Tool, but with a more user-friendly interface.
To use Snip & Sketch:
- Press the Windows key and type "Snip & Sketch" into the search bar, thenpress Enter.
- Once Snip & Sketch is open, you can Click "New" to start a new snip.
- Choose the type of snip you want (rectangular, freeform, window, or full-screen).
- Capture the part of the screen you want to screenshot.
- Customize your screenshot if needed. You can annotate your screenshot with a pen, pencil, or highlighter tool, or add notes and captions.
- Click the disk icon to save your snip.
Windows Screenshot Shortcuts
Shortcuts are time savers, and they apply to taking screenshots too. Using a screenshot shortcut is especially helpful when you need to take a screenshot quickly. Here are the four most commonly used shortcut keys for taking screenshots on Windows:
PrtScn
Pressing the "PrtScn" key, as mentioned earlier, takes a full-screen screenshot. This is the fastest way to capture your entire screen.
Alt + PrtScn
Using the key combination "Alt + PrtScn" captures the active window, similar to clicking on it with a mouse. This shortcut is convenient when you only need to capture one window instead of the whole screen.
Windows + PrtScn

The Windows key combined with the PrtScn button is an incredibly straightforward way to capture your screen. Here's how it works:
- Press the Windows key and the PrtScn button simultaneously.
- You might notice a brief dimming of your screen, indicating that the screenshot has been taken.
- The screenshot is automatically saved in the "Screenshots" folder within your "Pictures" library.
- The file name will usually include the date and time, making it easy to find your screenshots later.
- To locate your screenshot, open File Explorer and navigate to the "Pictures" library. From there, open the "Screenshots" folder.
- You can now view, edit, or share your screenshot as needed. It's ready to use right away!
Windows Key + Shift + S

- Hold down the Windows key and Shift key simultaneously, and then tap the "S" key. (Press Windows Key + Shift + S)
- Your screen will dim, and a small overlay menu will appear at the top of the screen. This menu provides you with different snipping options - rectangular, freeform, window, and full-screen.
- Click and drag to select the area you want to capture, or choose one of the snip modes by clicking on it in the overlay menu.
- Copy your screenshot to the clipboard.
- You can now paste it into an image editor, document, or wherever you need it.
Third-Party Screenshot Apps for Windows
Did you know that there are also third-party screenshot apps available for Windows? These apps offer more advanced features and customization options to enhance your screenshot-taking experience. Here are three popular options:
- Lightshot: A simple but powerful app that allows you to take screenshots, edit them on the spot, and share them with others. It's free and offers features such as adding text or arrows to your screenshot, capturing a specific area with precision, and searching for similar images online.
- Greenshot: A lightweight yet feature-packed app that gives you the ability to capture screenshots in various ways (including timed capture), edit them with annotations and obfuscation, and share them directly to a variety of destinations. It's open-source and available for free.
- Snagit: A professional-level app that offers advanced features such as video recording, scrolling screenshots, and even OCR (optical character recognition) to extract text from images. It's a paid app but comes with a free trial version for you to try out before purchasing.
- ShareX: A popular free and open-source app that offers advanced screenshot-taking features, such as customizable hotkeys, auto-upload to various cloud destinations, and even tools for capturing scrolling windows and recording GIFs. It's continually being updated by its community of users.
These are just some of the many screenshot tools available for Windows. Depending on your needs, you can choose the one that works best for you. Whether it's a built-in feature or a third-party app, taking screenshots on Windows has never been easier!
Conclusion
Throughout this guide, we've explored a variety of methods for capturing your screen on Windows. From the simple and efficient Windows key + PrtScn combination to more advanced tools like Snipping Tool and Snip & Sketch, you've gained the knowledge to choose the right method for your specific needs.
Screenshots aren't just images; they're the documentation of our digital lives, serving as proof, communication aids, and creative outlets. They help us troubleshoot, collaborate, remember, and share. Whether you're using them for work, study, or personal enjoyment, the ability to take and use screenshots effectively is a skill that can save you time, enhance your productivity, and even bring a bit of creativity to your digital endeavors.
Supercharge Your Productivity With Truly Office
Discover a new way to enhance your productivity with Truly Office - the ultimate alternative to Microsoft Office. Unlock a world of possibilities by exploring our website and discovering the power of Truly Office. Don't miss out on valuable writing tips, troubleshooting advice, and informative articles. Take your writing skills to the next level!
Ready to revolutionize your office suite? Dive deeper into our comprehensive suite of tools designed to make your work life easier. Join the growing community of satisfied users who have already made the switch to Truly Office.
Don't settle for the status quo. Remember, success starts with the right tools. Visit Truly Office now and experience a whole new level of productivity.
